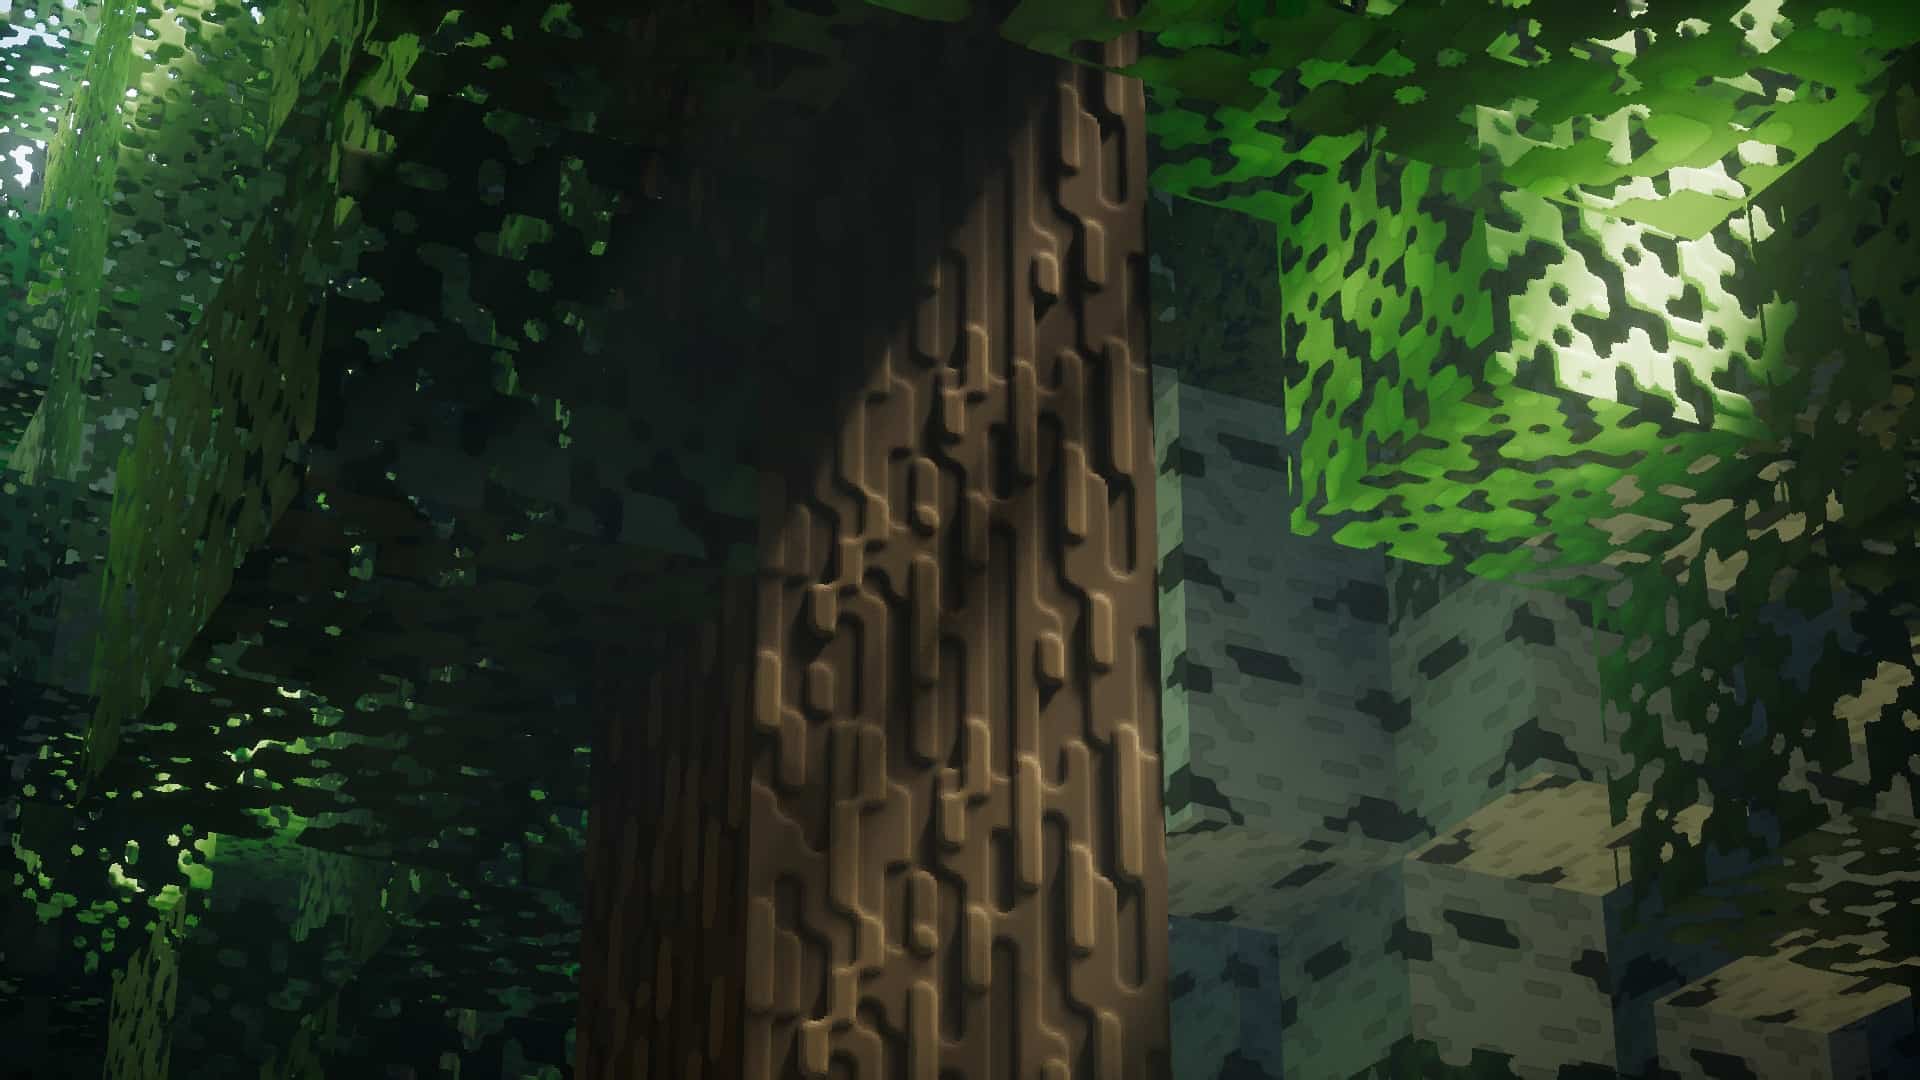
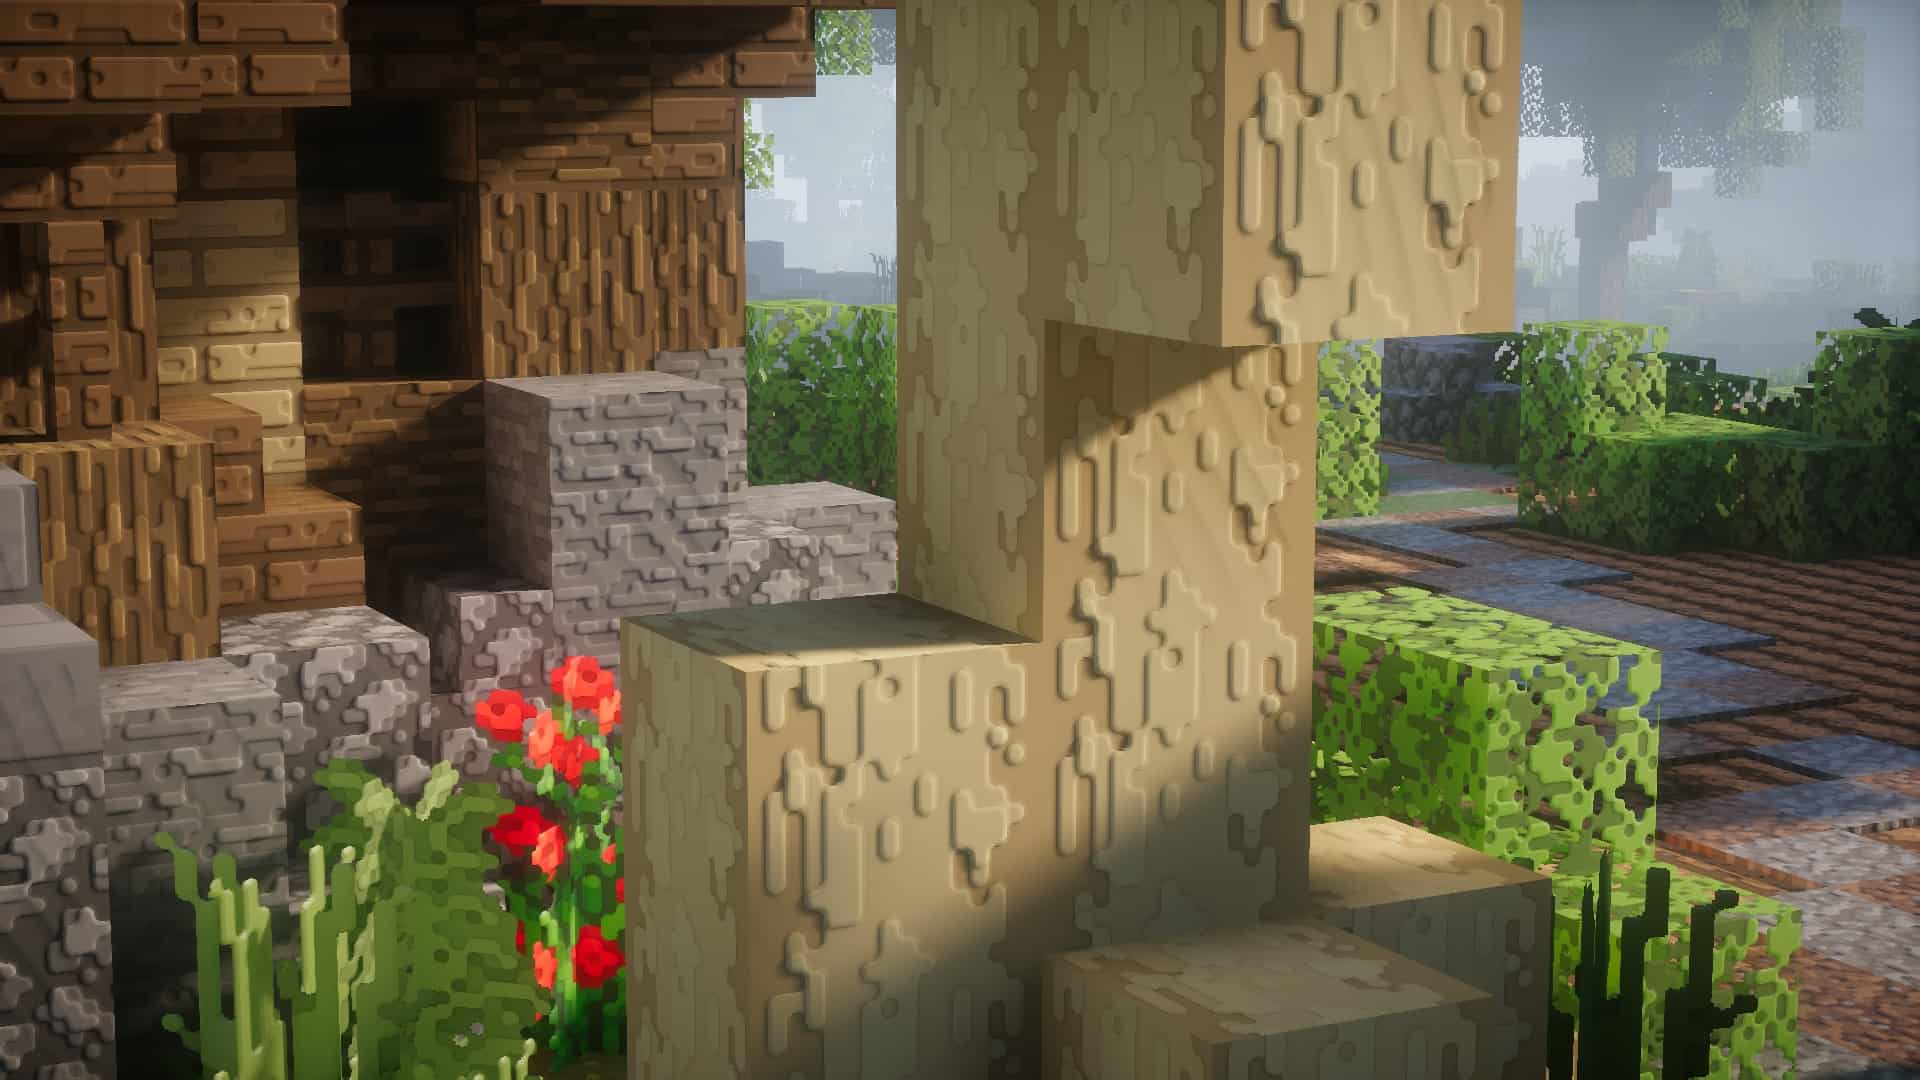
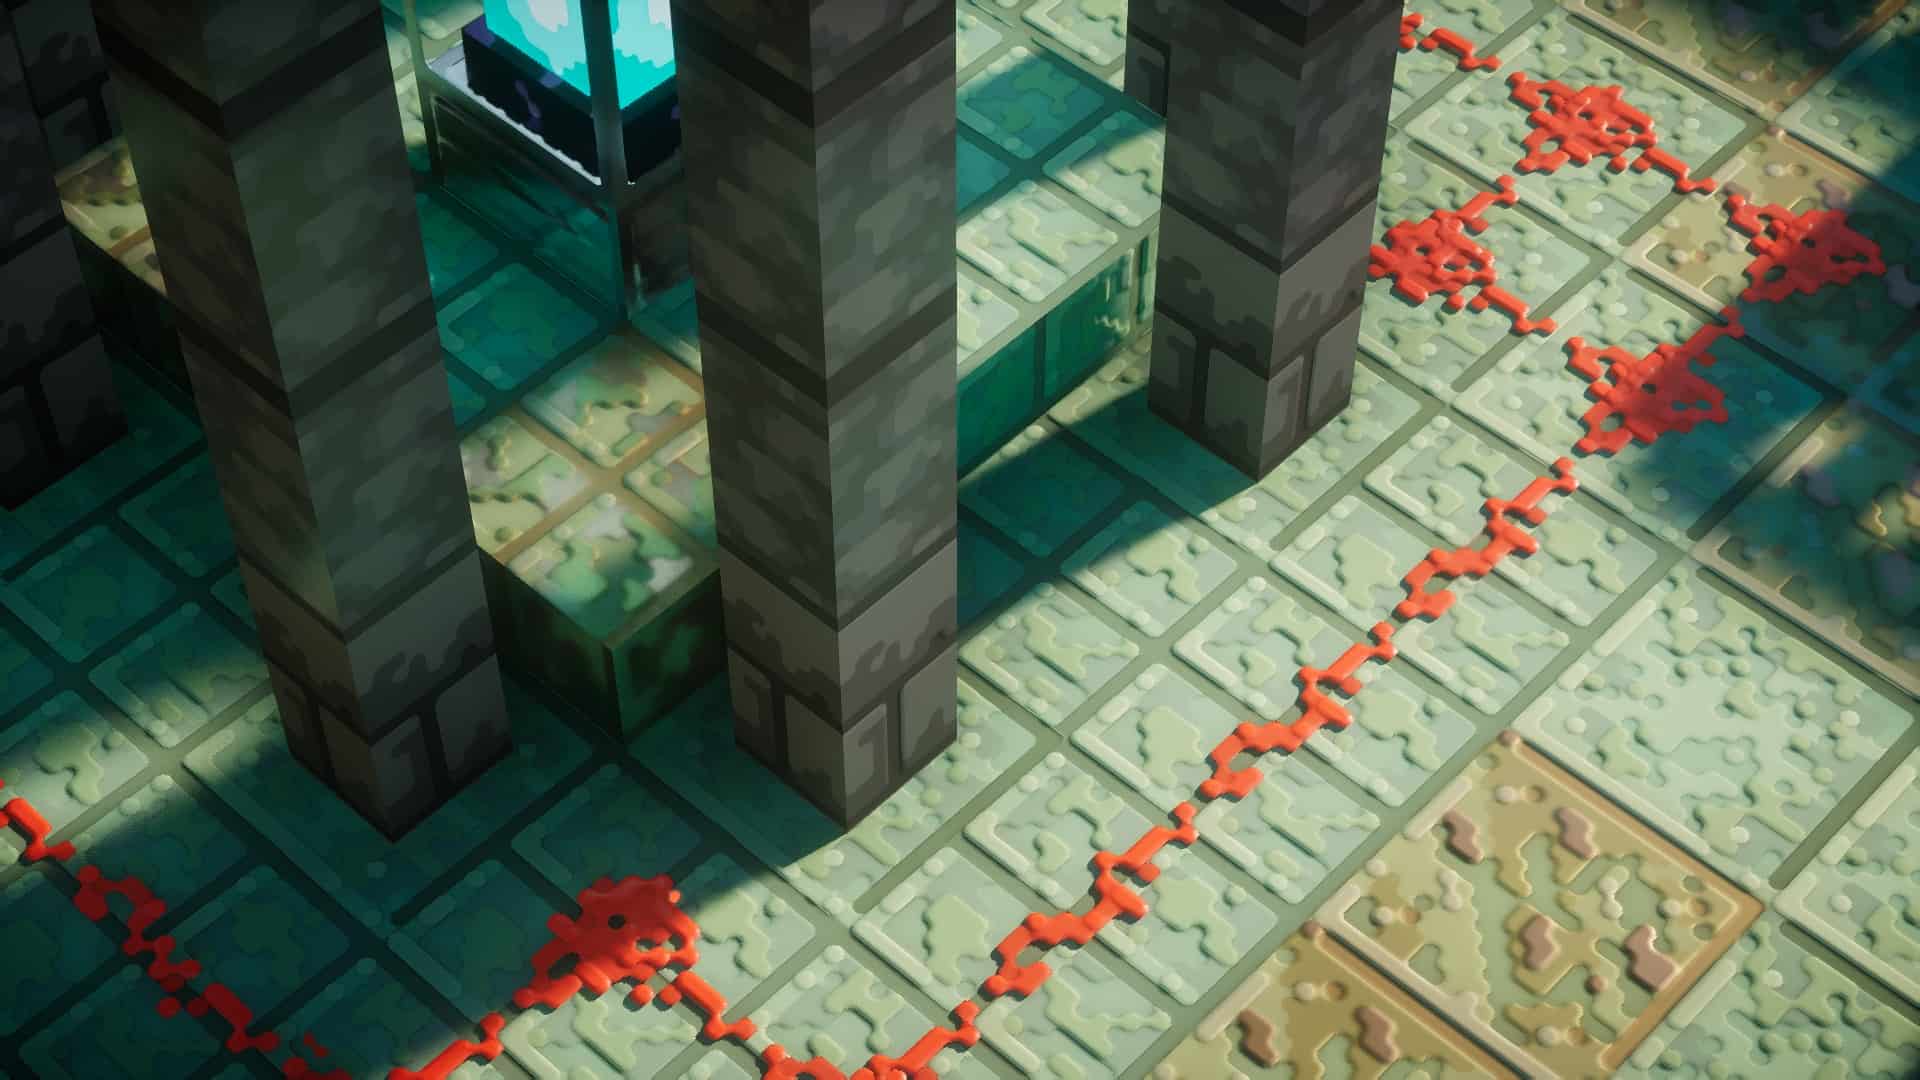
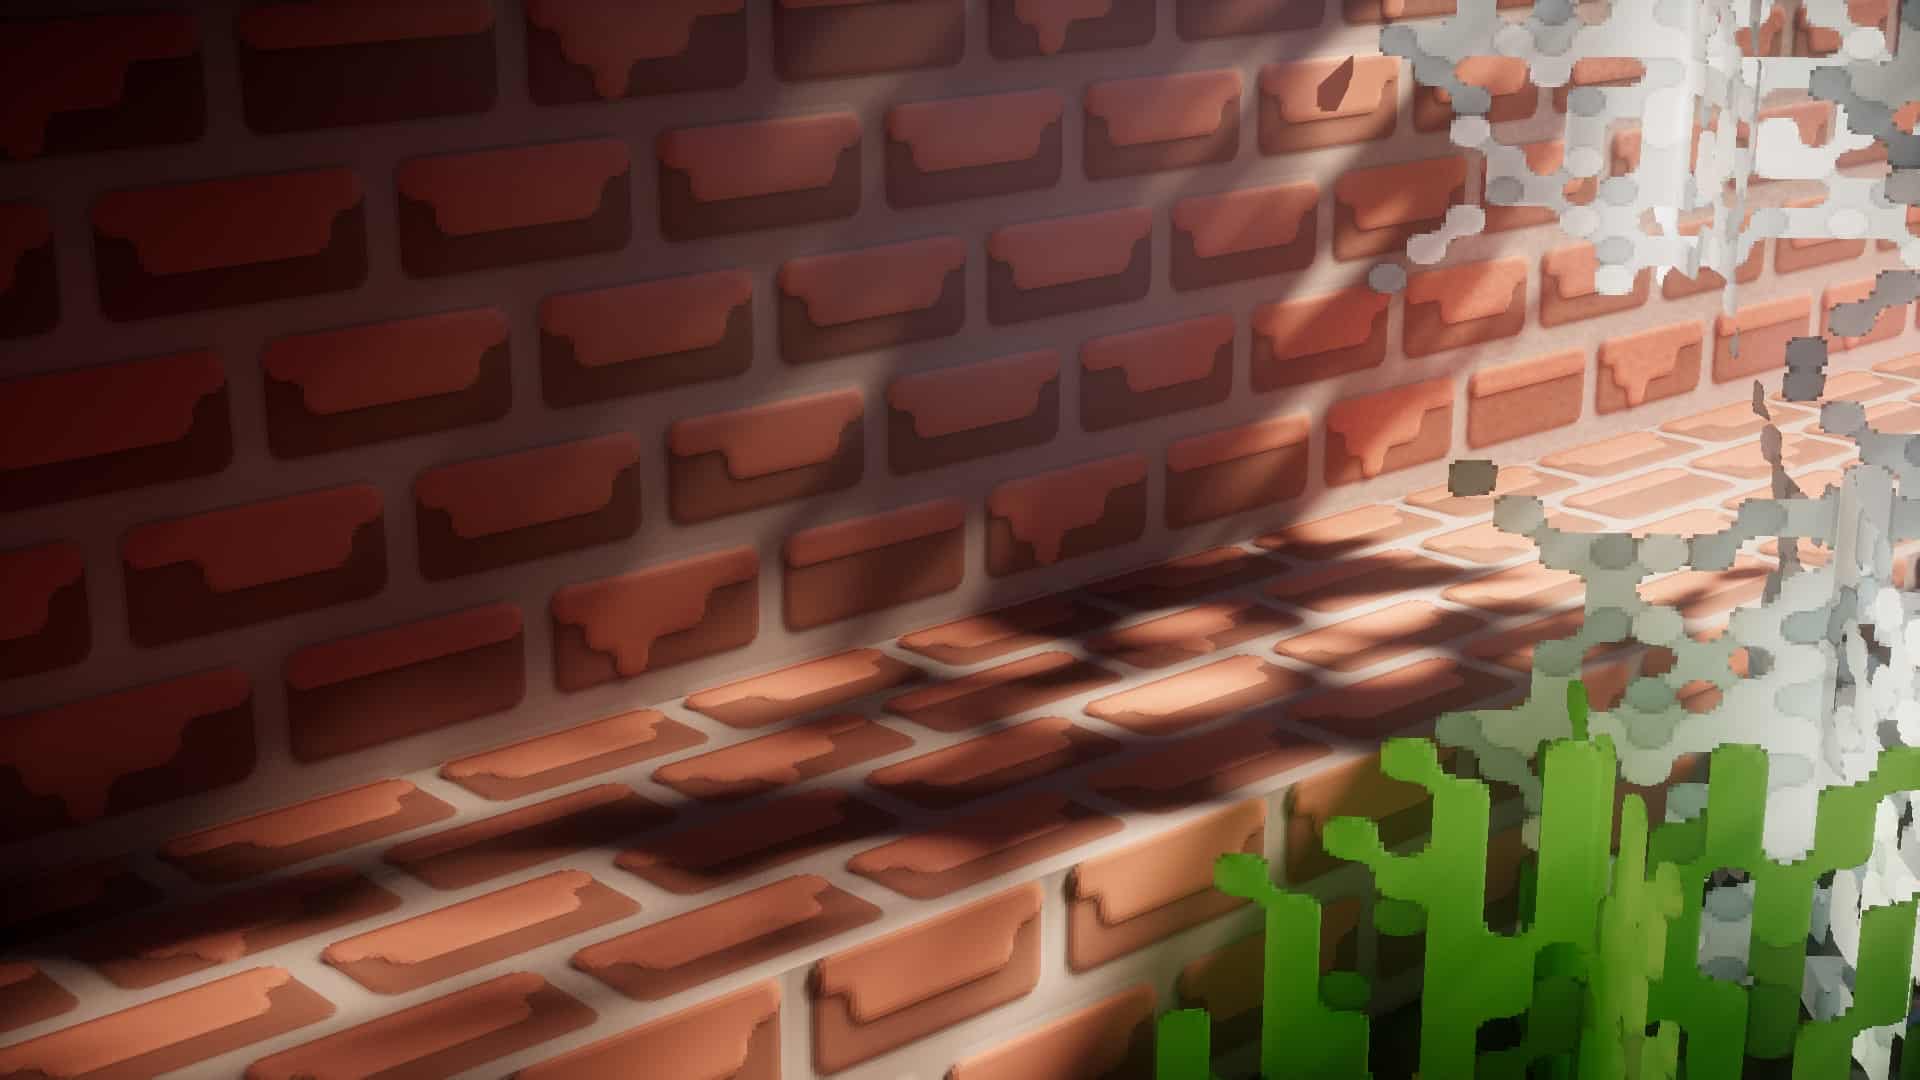
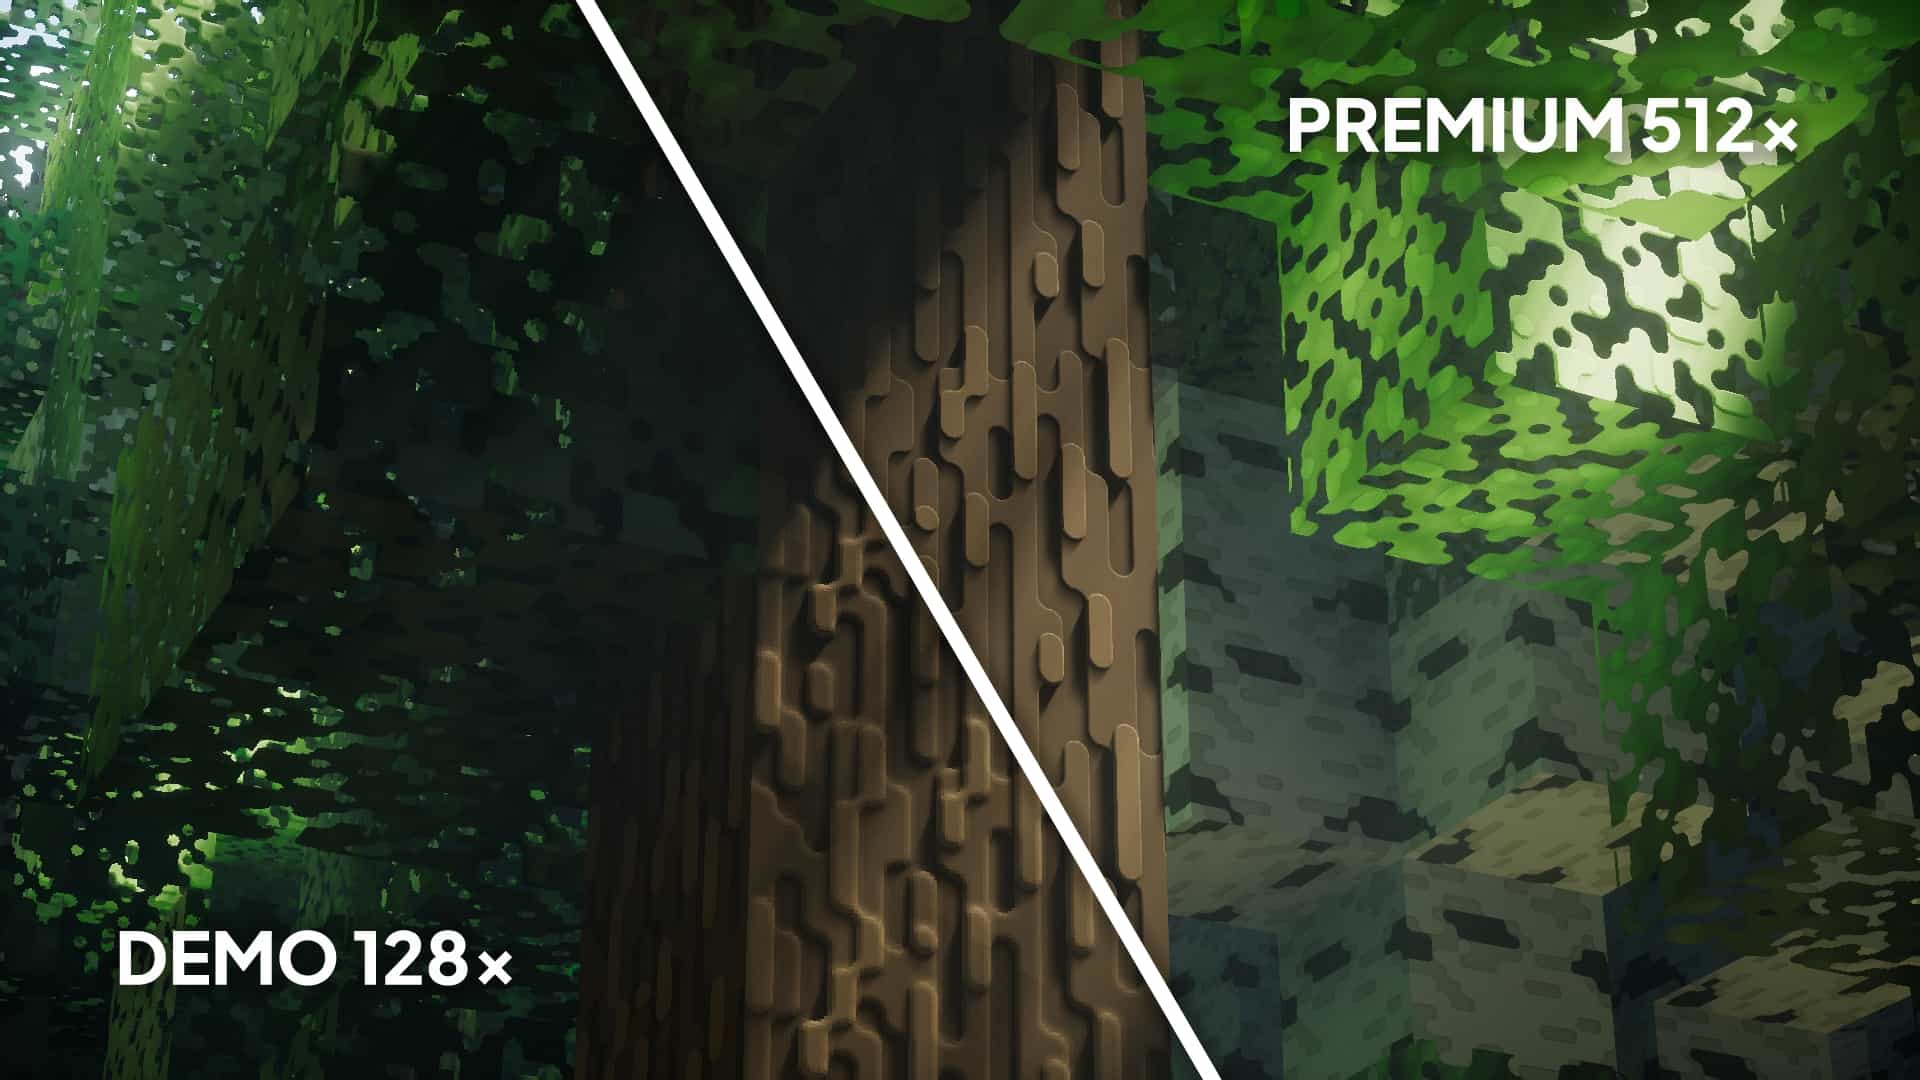
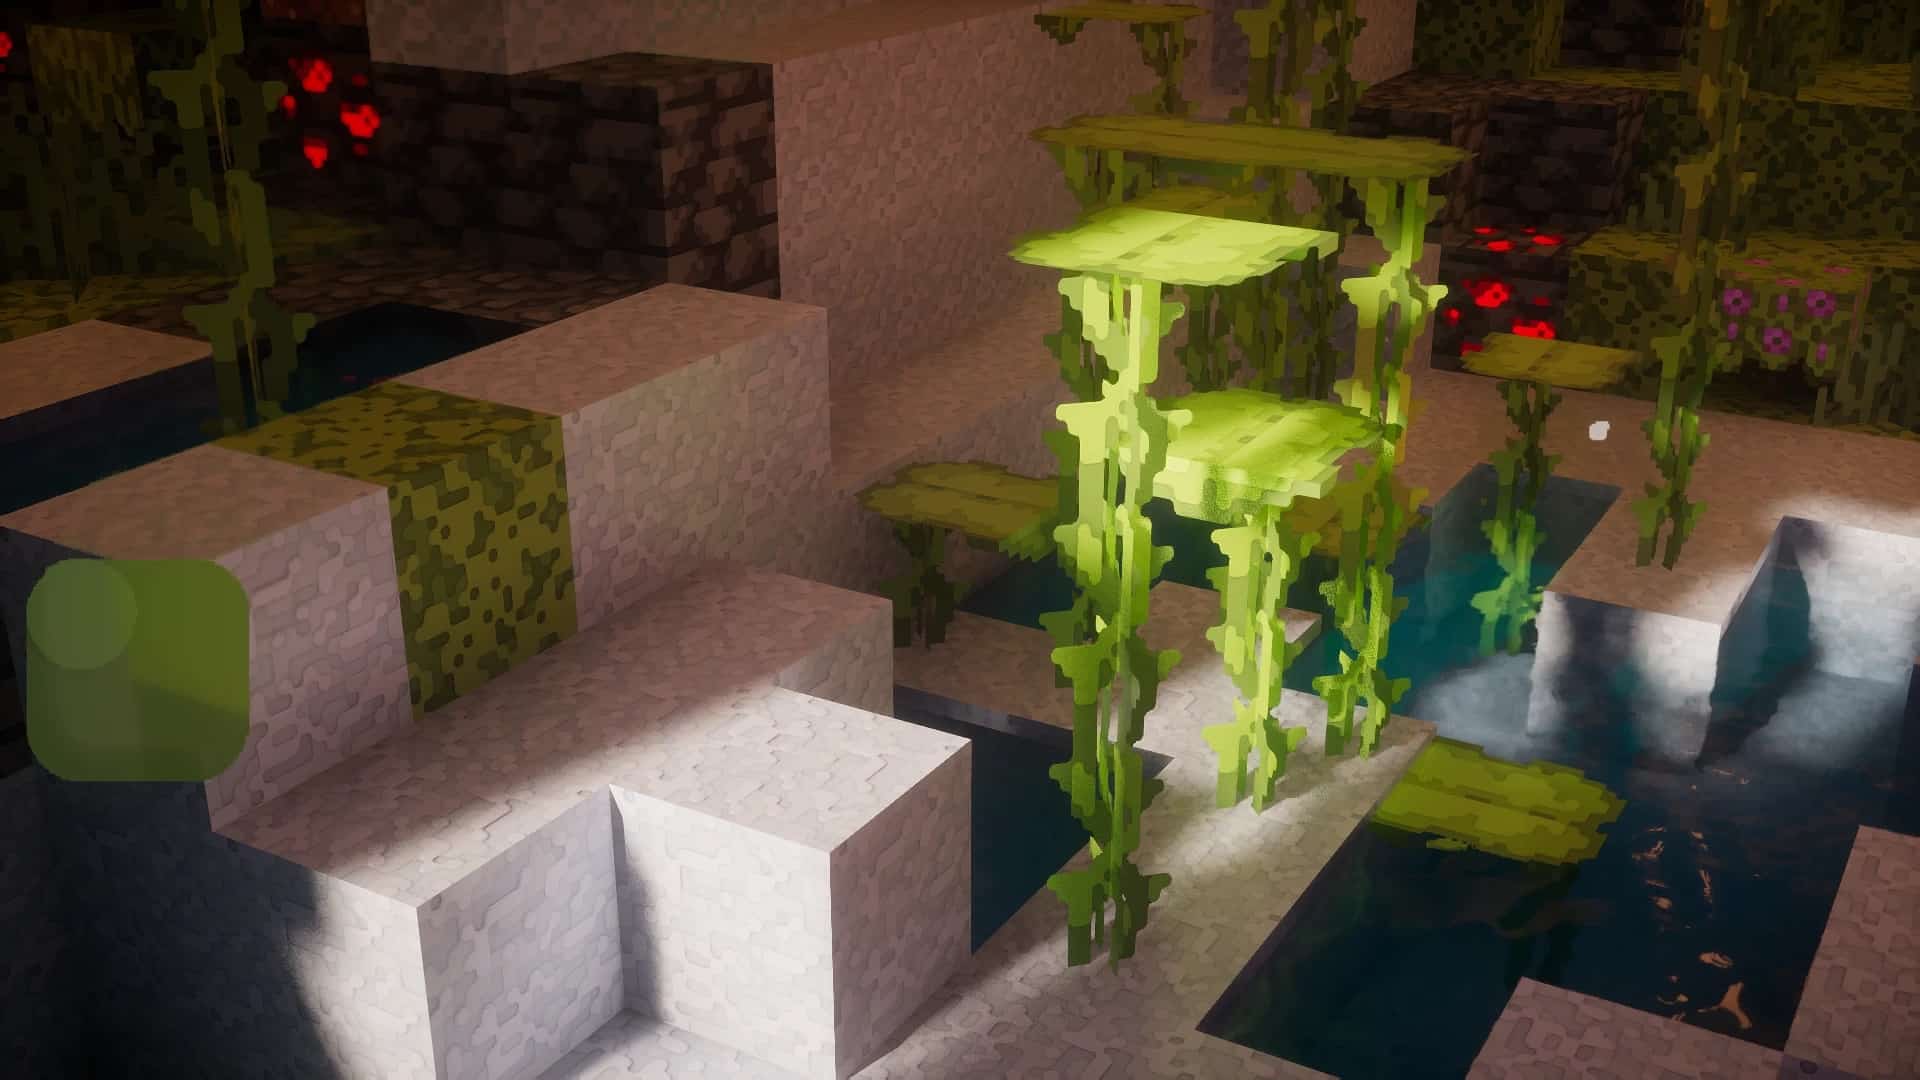
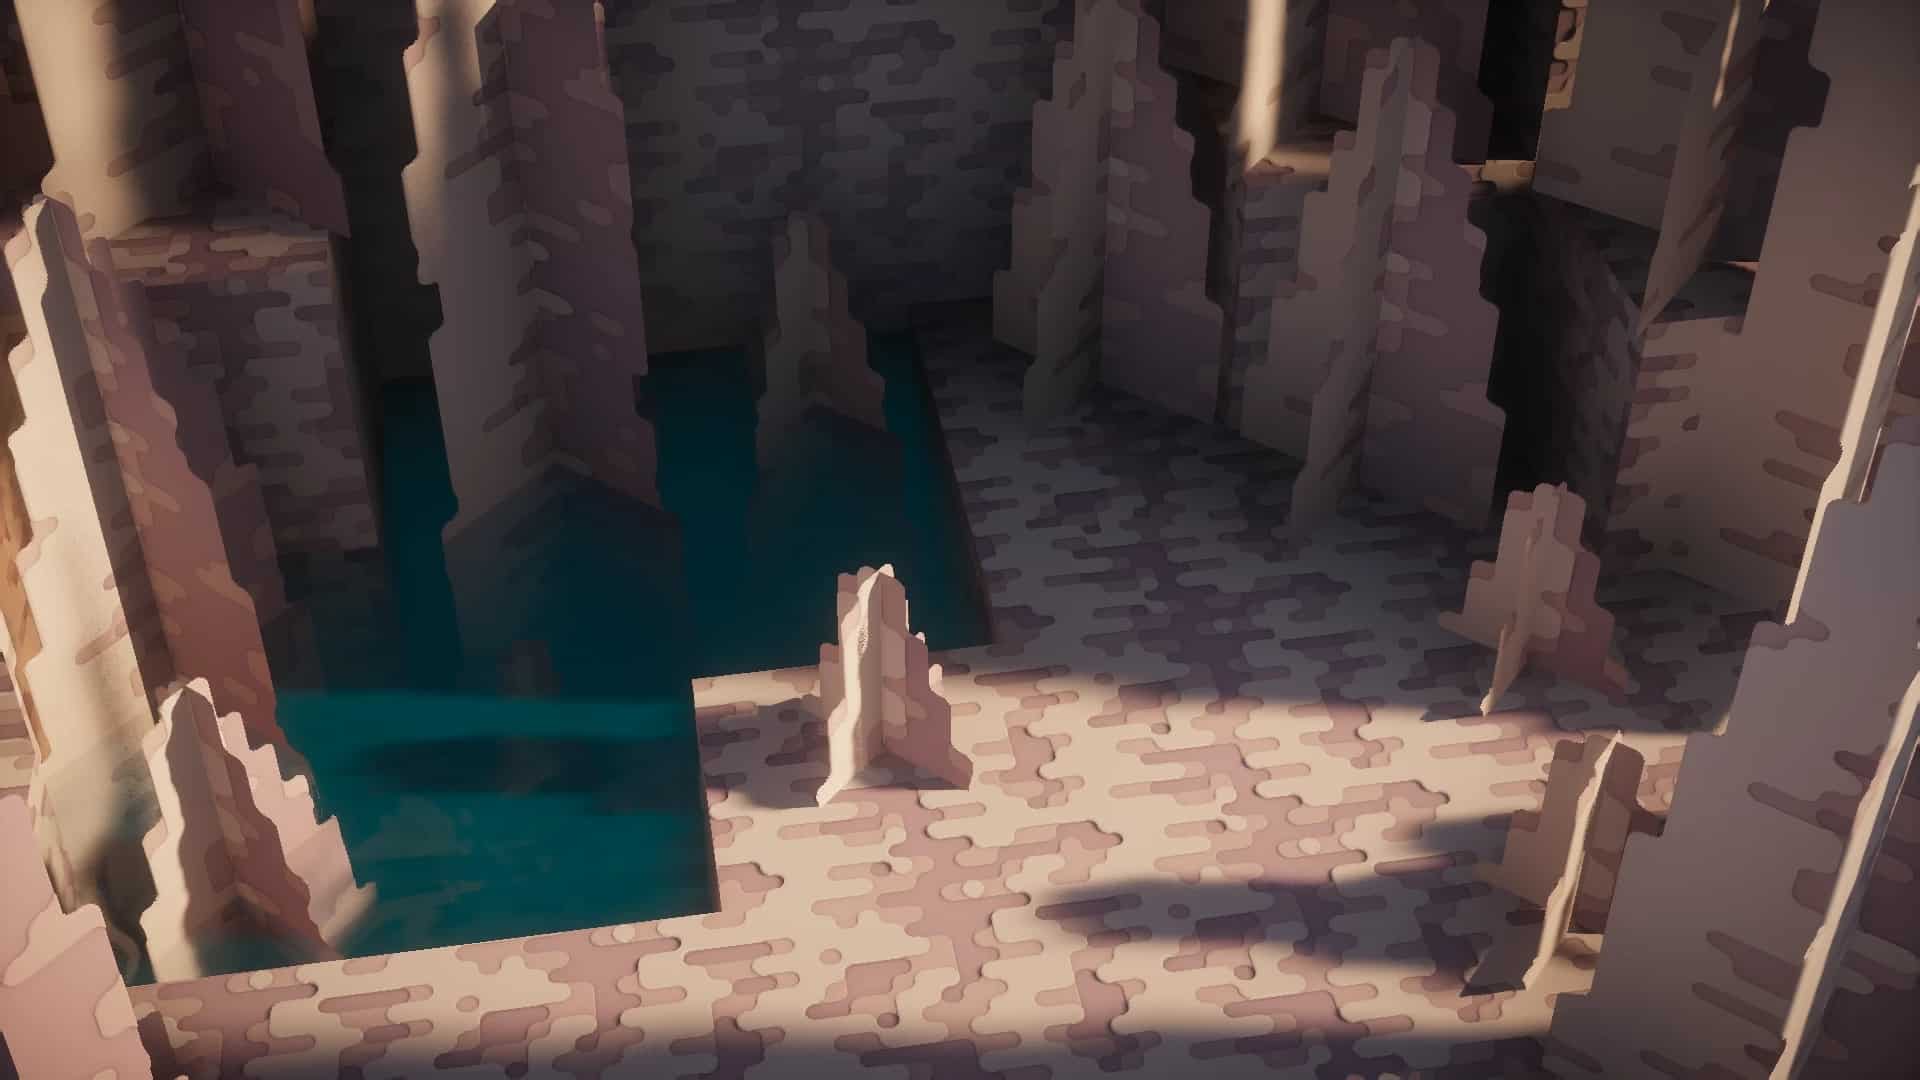
If you ever wondered how Minecraft would look without the jagged edges and with triple-A game graphics quality, the Roundista resource pack gets very close to that visualization. Released in March of 2022, it’s one of the newer packs that managed to attract the attention of the Minecraft community mostly due to its very ambitious style that utilizes some of the latest rendering techniques. The creator, Shivamzter, already has experience with resource pack development, and it seems like Roundista is well on its way to becoming his most successful project to date. While there are numerous HD packs out there, Roundista is unique in its very specific compatibility with various shader packs. It has been designed in compliance with the LabPBR standard that allows resource pack developers to encode specific information for each texture, which ultimately makes the game look much better and true to life. When you first join the world with Roundista enabled, you’ll notice the increased depth in every single texture. This is made possible with the use of Normal Maps, a computer graphics element that is designed to simulate 3D objects. This is why you’ll be able to notice bumps, scratches, and grooves in various blocks such as oak logs, cobblestone, bricks, and so on. Although these elements can be noticed in the nature biomes, they’re much more prominent once you enter the mines and start exploring. Another large feature concerns the lighting effects. Full metal blocks, such as copper and iron, are highly reflectable and shiny. Other blocks have their own corresponding finishes – matte, glossy, metallic, etc. All of this Roundista is able to achieve with the help of various techniques such as Specular Maps, Subsurface Scattering, Porosity, and others. This means that, for example, one and the same build can look completely different depending on how light or dark it is.
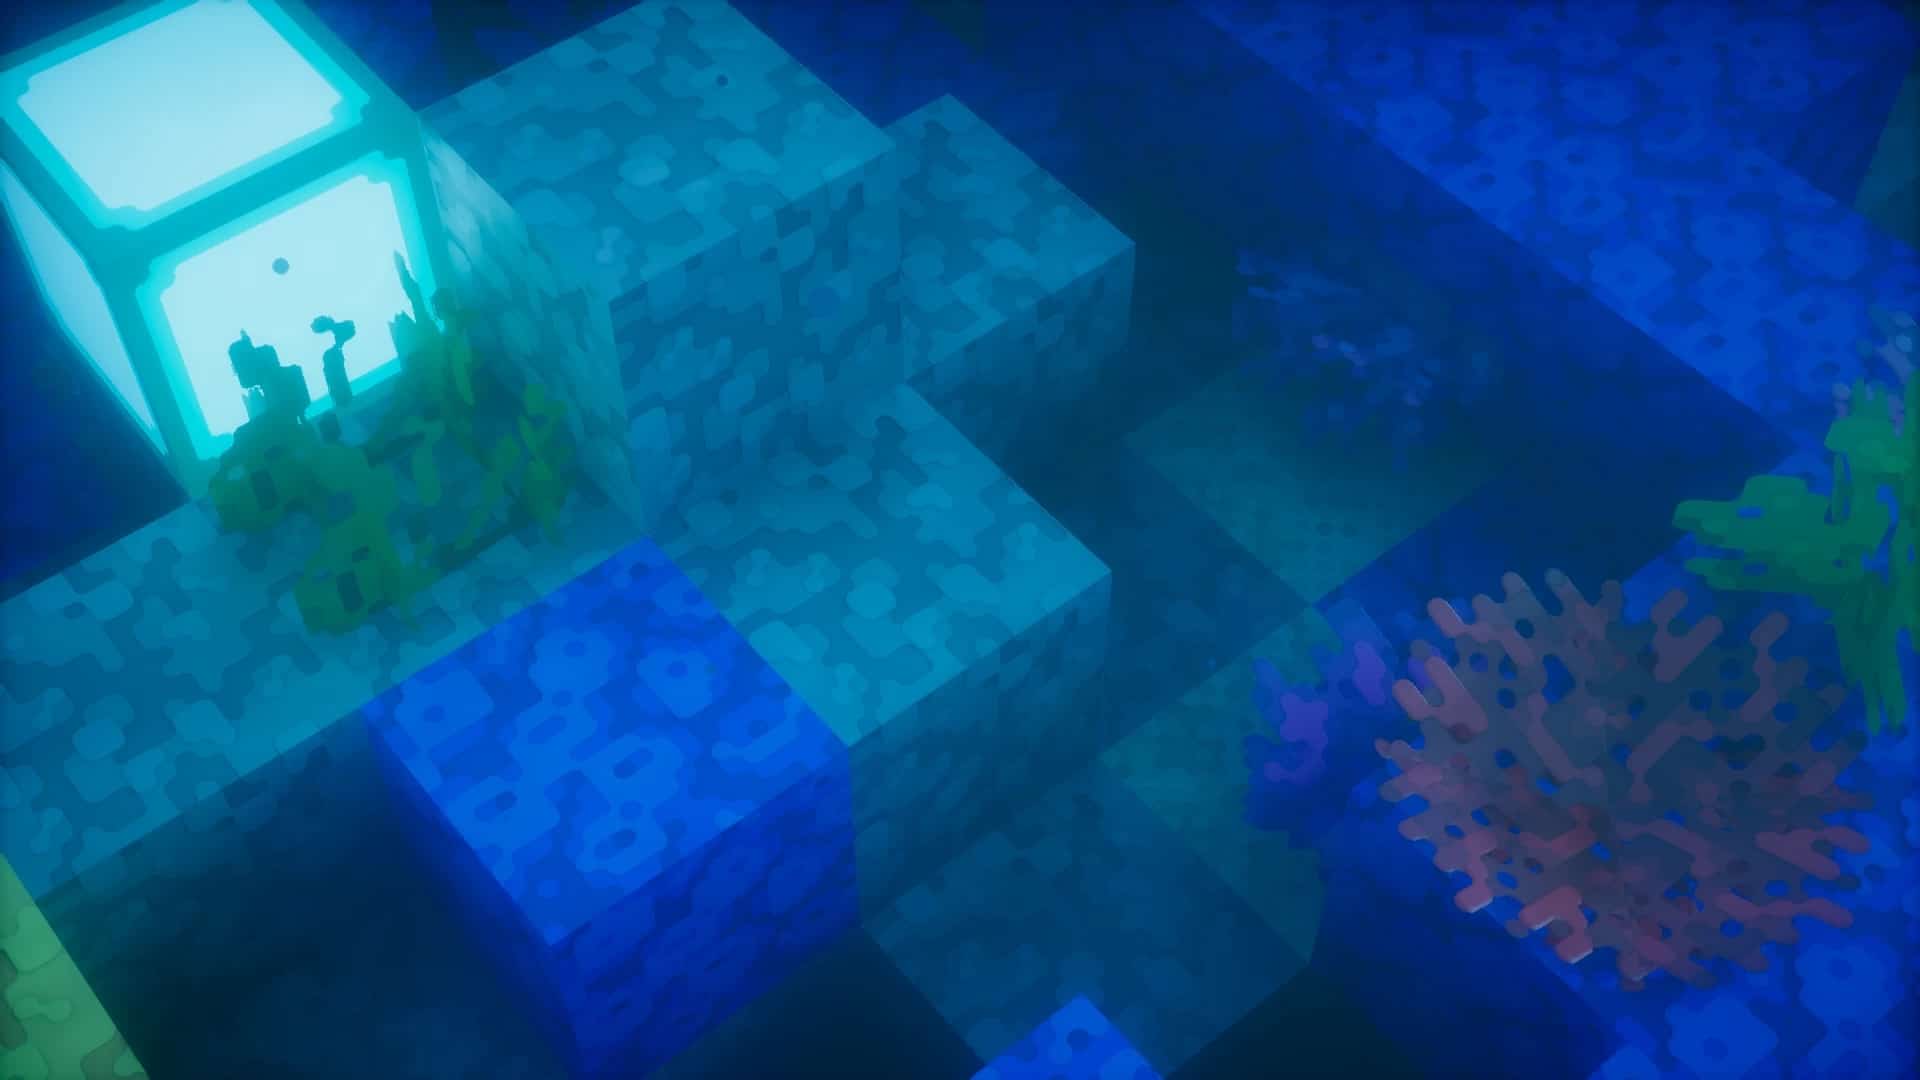
This gives you a lot of freedom as far as creativity goes – a single Glowstone block or a torch can change the complete appearance of your Minecraft home. Solid blocks aren’t the only ones that have undergone a change. Water has been completely transformed – it has a whole new ripple effect that is unlike anything you’ve seen before. The dynamic water reflection is incredible, and the blocks on top of it look like they’re going to sink down. Even single-block water sources have realistic effects, which means that your farm is going to look pretty awesome once you start using the pack. Even with all of the aforementioned features, keep in mind that Roundista is still far from finished. Currently, the pack is around 50% done. This means that many of the blocks won’t be able to display these enhancements, but updates are regular and come out on a weekly basis. Currently, the pack is available only for Minecraft Java and it comes with built-in support for Optifine and Iris. As far as versions are concerned, Roundista comes in three different resolutions – 128x, 256x, and 512x. However, only the lowest one is available for free and in a demo form. The two higher-resolution versions can either be bought for a one-time fee or on a subscription basis. While the price is fairly steep, you also get access to the developer’s two former resource packs, access to premium add-ons, Discord perks, and so on. When talking about performance, Roundista is one of those resource packs that require a high-end computer to truly shine. The developer himself suggests using LabPBR-compliant shaders to get the most out of it. Although you can use the pack standalone, the depth of the textures and all fancy effects are going to be much less prominent. The 3D appearance of the terrain relies on lighting processing, so don’t be surprised if the pack looks totally different than what you see in the pictures. Also, make sure to follow the official installation steps to avoid any issues since Roundista is a work in progress. All things considered, this is one of the most promising resource packs out there. Even at this stage, it’s better than a lot of fully finished releases, and there are still plenty of new features to come. If you have a fairly modern PC, you should definitely give it a shot.
Roundista should be compatible with all of these Minecraft versions: 26.2 - 26.1.2 - 26.1.1 - 26.1 - 1.21.11 - 1.21.10 - 1.21.9 - 1.21.8 - 1.21.7 - 1.21.6 - 1.21.5 - 1.21.4 - 1.21.3 - 1.21.2 - 1.21.1 - 1.21 - 1.20.6 - 1.20.5 - 1.20.4 - 1.20.3 - 1.20.2 - 1.20.1 - 1.20 - 1.19.4 - 1.19.3 - 1.19.2 - 1.19.1 - 1.19 - 1.18.2 - 1.18.1 - 1.18 - 1.17.1 - 1.17 - 1.16.5 - 1.16.4 - 1.16.3 - 1.16.2 - 1.16.1 - 1.16 - Bedrock Edition - PE
Roundista — Video & Screenshots
How to install Roundista Resource Pack:
IMPORTANT: You need Optifine or Iris with the Continuity & Puzzle mod and a LabPBR complaint shader pack to make everything work and achieve the same effects as shown in the screenshots.
- Download and install shader pack of your liking. You can find many high quality shader packs here. – whatever you choose, read the installation guide there, it should be just below the media section (screenshots and videos).
- Download the Roundista texture pack for Minecraft from the download section below. – download the pack depending on which shader pack (LabPBR) you are using and resolution (128x is completely free, higher resolution versions are only available for Patreon subscribers);
- Launch the game client through the Minecraft launcher.
- On the main menu, click “Options”.
- On the options menu, click “Resource Packs…”.
- Click on “Open Resource Pack Folder”. – folder titled “resourcepacks” will pop up
- Move the .zip file(s) you got in step 2 to the newly opened “resourcepacks” folder.
- Click “Done”.
- Click on “Resource Packs…” again.
- Your pack & add-ons should have appeared in the left window, just hover over it and click on the arrow pointing to the right. Make sure add-ons are always on top. – For Premium Texture Pack, the loading order is Basic > Bonus > Mobs > Items > Foliage;
- Click “Done” again.
- The pack has now been successfully loaded and ready to be used in your world!
Recommended Shaders:
It is recommended to use a LabPBR compliant shader to get the most out of Roundista, Shivamzter recommend using Nostalgia/NostalgiaVX Shaders by Rre36. But any other shaders from the list below will also work fine.
- Kappa
- KappaPT
- Nostalgia
- NostalgiaVX
- SoftVoxels
- BSL
- AstraLex
- Complementary
- Complementary Reimagined
- Photon
- Seus PTGI HRR 3
Required Shader settings:
Click on the name of the shader pack (the one you are using) below and it will show you all the necessary settings you need to set for the pack to work properly. For other shaders and more detailed instructions, please visit the official Roudista installation instructions page here.
Kappa
Options > Video Settings > Shader Packs/Shaders > Shader Pack Settings/Shader Options
– Lighting > Direct Light > Subsurface Scatter: labPBR Only
– Lighting > Indirect Light > Emission Mode: Hardcoded + labPBR
– Lighting > Indirect Light > Texture AO: ON
– Terrain > Vertex Attribute Fix: ON
– Terrain > Reflections > Resourcepack Reflections: ON
– Terrain > Parallax Occlusion Mapping > Enabled: ON
– Terrain > Parallax Occlusion Mapping > Samples: 512 (otherwise match with Texture Pack’s Resolution at minimum)
– Terrain > Parallax Occlusion Mapping > Slope Normal Calculation: ON
KappaPT
Options > Video Settings > Shader Packs/Shaders > Shader Pack Settings/Shader Options
– Lighting > Direct Light > Subsurface Scatter: labPBR Only
– Lighting > Emission Colors > Emission Mode: Hardcoded + labPBR
– Lighting > Indirect Lighting > Texture AO: ON
– Terrain > Reflections > Resourcepack Reflections: ON
– Terrain > Reflections > VoxelPT Reflections: ON
– Terrain > Reflections > Denoiser > Reflections Denoising: ON
– Terrain > Refractions > Mode: Raytraced
– Terrain > Parallax Occlusion Mapping > Enabled: ON
– Terrain > Parallax Occlusion Mapping > Samples: 512 (otherwise match with Texture Pack’s Resolution at minimum)
– Terrain > Parallax Occlusion Mapping > Slope Normal Calculation: ON
Nostalgia
Options > Video Settings > Shader Packs/Shaders > Shader Pack Settings/Shader Options
– Lighting > Direct Light > Contact Shadows: ON
– Lighting > Direct Light > Subsurface Scatter: labPBR Only
– Lighting > Indirect Light > Emission Mode: Hardcoded + labPBR
– Lighting > Indirect Light > Texture AO: ON
– Terrain > Vertex Attribute Fix: ON
– Terrain > Reflections > Resourcepack Reflections: ON
– Terrain > Parallax Occlusion Mapping > Enabled: ON
– Terrain > Parallax Occlusion Mapping > Samples: 512 (otherwise match with Texture Pack’s Resolution at minimum)
– Terrain > Parallax Occlusion Mapping > Slope Normal Calculation: ON
NostalgiaVX
Options > Video Settings > Shader Packs/Shaders > Shader Pack Settings/Shader Options
– Lighting > Direct Light > Subsurface Scatter: labPBR Only
– Lighting > Emission Colors > Emission Mode: Hardcoded + labPBR
– Lighting > Indirect Lighting > Texture AO: ON
– Terrain > Reflections > Resourcepack Reflections: ON
– Terrain > Reflections > VoxelPT Reflections: ON
– Terrain > Reflections > Denoiser > Reflections Denoising: ON
– Terrain > Parallax Occlusion Mapping > Enabled: ON
– Terrain > Parallax Occlusion Mapping > Samples: 512 (otherwise match with Texture Pack’s Resolution at minimum)
– Terrain > Parallax Occlusion Mapping > Slope Normal Calculation: ON
SoftVoxels
Options > Video Settings > Shader Packs/Shaders > Shader Pack Settings/Shader Options
– Lighting > Indirect Light > Emission Mode: Hardcoded + labPBR
– Lighting > Indirect Light > Texture AO: ON
– Terrain > Vertex Attribute Fix: ON
– Terrain > Reflections > VoxelPT Reflections: ON
– Terrain > Parallax Occlusion Mapping > Enabled: ON
– Terrain > Parallax Occlusion Mapping > Samples: 512 (otherwise match with Texture Pack’s Resolution at minimum)
– Terrain > Parallax Occlusion Mapping > Slope Normal Calculation: ON
BSL
Options > Video Settings > Shader Packs/Shaders > Shader Pack Settings/Shader Options
– Material > Advanced Materials: ON
– Material > Refraction: Full
– Material > Normals & Parallax > Parallax Samples: 512 (otherwise match with Texture Pack’s Resolution at minimum)
– Material > Normals & Parallax > Parallax Depth: 25cm
– Material > Normals & Parallax > Self Shadow Samples: 16
AstraLex
Options > Video Settings > Shader Packs/Shaders > Shader Pack Settings/Shader Options
– Advanced Materials > Reflections > Translucent Reflections: ON
– Advanced Materials > Parallax > Parallax Occlusion Mapping: ON
– Advanced Materials > Parallax > Self Shadows: ON
– Advanced Materials > Parallax > Parallax Quality: 512 (otherwise match with Texture Pack’s Resolution at minimum)
– Advanced Materials > Parallax > Parallax Depth: 25cm
– Material > Normals & Parallax > Self Shadows Samples: 16
Complementary
Options > Video Settings > Shader Packs/Shaders > Shader Pack Settings/Shader Options
– RP Support: labPBR (RP Required)
– Materials > Normalmap Related Settings > Parallax Depth: 25cm
– Materials > Normalmap Related Settings > Parallax Quality: 512
Complementary Reimagined
Options > Video Settings > Shader Packs/Shaders > Shader Pack Settings/Shader Options
– RP Support: labPBR (RP Required)
– Materials > SEUSPBR / labPBR > POM Depth: 1.00
– Materials > SEUSPBR / labPBR > Quality: 512
– Materials > SEUSPBR / labPBR > POM Lighting Mode: Smooth
– Materials > SEUSPBR / labPBR > POM on Cutout Surfaces: ON
Photon
Options > Video Settings > Shader Packs/Shaders > Shader Pack Settings/Shader Options
– Materials > Normal Mapping: ON
– Materials > Parallax Occlusion Mapping: ON
– Materials > Specular Mapping: ON
– Materials > Hardcoded SSS: OFF
– Materials > Hardcoded Specular Mapping: OF
– Materials > Resource Pack Settings > POM Self-Shadowing: ON
– Materials > Resource Pack Settings > Parallax Samples: 64
– Materials > Resource Pack Settings > POM Self-Shadow Samples: 32
Seus PTGI HRR 3
Options > Video Settings > Shader Packs/Shaders > Shader Pack Settings/Shader Options
– Texture Resolution: Match with Texture Pack’s Resolution
– Ray Tracing > Full Raytrace Reflections: ON
– Ray Tracing > Screen-Space Reflection Tracing: ON
– Ray Tracing > Screen-Space GI Tracing: ON
– Ray Tracing > Glowing Emerald Block: OFF
– Ray Tracing > Glowing Lapis Lazuli Block: OFF
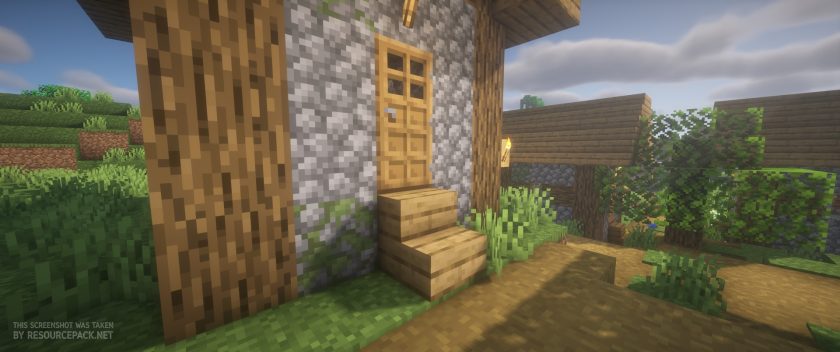
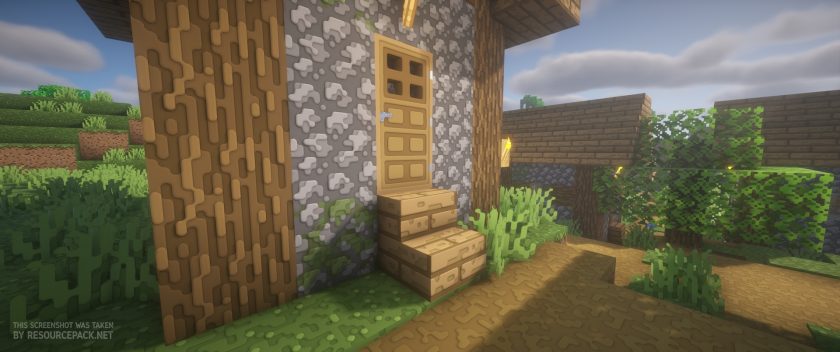
Roundista - Comparison Slider #1
Move slider back and forth to see vanilla Minecraft on the left and the beautiful resource pack on the right. Use the buttons below to see how the pack looks in different situations.
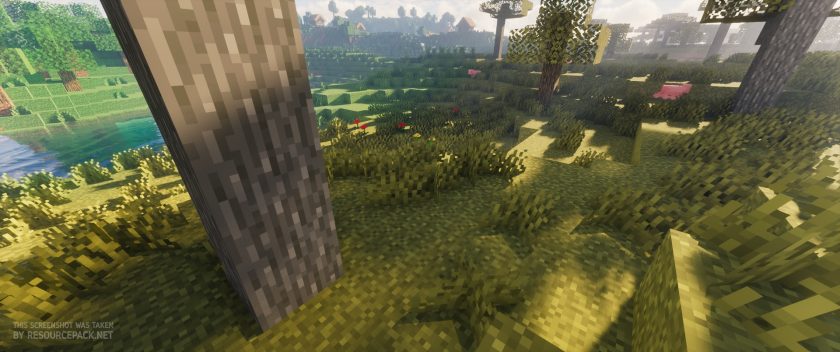 Vanilla (Kappa Shaders)
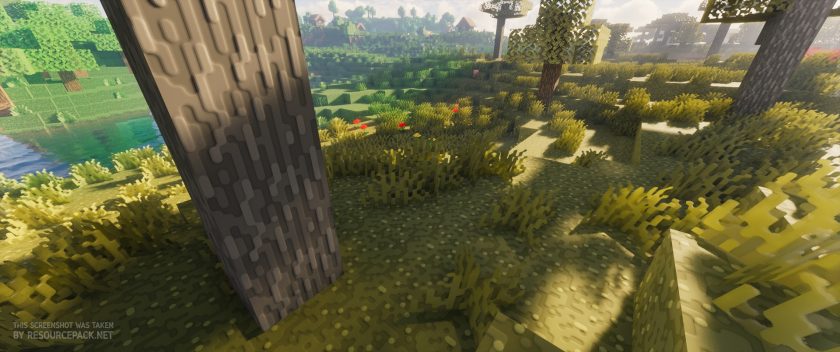 Roundista (Kappa Shaders)
Roundista Texture Pack Download
- We do not modify or edit any resource packs. All resource packs, shaders and tools found on this website are linked directly to official sources rather than hosted on our own servers. We provide only the official download links from the original creators to ensure that your files are safe and secure.
- These official links are updated manually and may occasionally stop working when a new version is released. We work hard to keep everything current so that you have a smooth experience. Please let us know in the comments if you find a link that no longer works.
- Minecraft is a trademark of Mojang Studios and has no official connection to this website. Our goal is simply to share the best creations from the community with other players.
- Please consider leaving a comment or voting for your favorite packs. This feedback helps authors improve their projects over time. You can also support the creators directly by visiting the official links located below the download section.
Bedrock Edition (Vibrant Visuals & RTX):
[128x] [1.21.x – 1.20.x] Download Roundista Bedrock Edition Resource Pack – absolutely free;
[256x] [1.21.x – 1.20.x] Download Roundista Bedrock Edition Resource Pack – for Patrons only;
Java Edition:
[128x] [26.2 – 1.16.x] Download Roundista Resource Pack – absolutely free;
[256x] [26.2 – 1.16.x] Download Roundista Resource Pack – for Patrons only;
[512x] [26.2 – 1.16.x] Download Roundista Resource Pack – for Patrons only;
Curseforge: download starts automatically after a few seconds;
Mediafire: click the big blue button with the text "DOWNLOAD";
Google Drive: in the top right corner you will see a small download icon (down arrow), click it and the download should start;

324 votes
Look.. 324 users have already liked this pack. Give a diamond if you like it too!


Flip
it is NOT compatible with 1.21.4…
MortemCapra
Wish the glass was continuous.
lol
a texture pack cant do that
Shivamzter
It can.
Shivamzter
It is in the 256/512x version of the pack, and you are required to use Continuity Mod if you are using Iris.