When you look at photos or videos of different resource packs, you cannot ignore that they simply look gorgeous. These promotional materials are deliberately made to impress but the moment you install the resource pack, you may notice that it does not look as pretty. This happens because all those stunning visuals are achieved by having something extra on top. Shader packs are the missing element that makes Minecraft look great. One such notable example is ProjectLUMA. ProjectLUMA shader pack can be seen as a passion project. The development team behind the shader pack took inspiration from KUDA shaders and wanted to make a spiritual successor. Built from scratch using new and original code, the shader pack aims to tackle some core problems that most other shader packs struggle with. One of the main focuses of the team behind ProjectLUMA is performance. Shader packs are known to be resource hogs. If you are running Minecraft on an older system, the moment you install some new shaders, you will see a drastic performance drop. This does not happen with ProjectLUMA or at least, the performance drop is not as drastic. The ProjectLUMA shader pack was released in late 2019 and since then it has not received any free updates. At the moment of release, the developers already finished work on the shader pack and made it available for multiple versions of Minecraft. But you can still get newer versions of this shader pack by supporting authors on their official patron page.
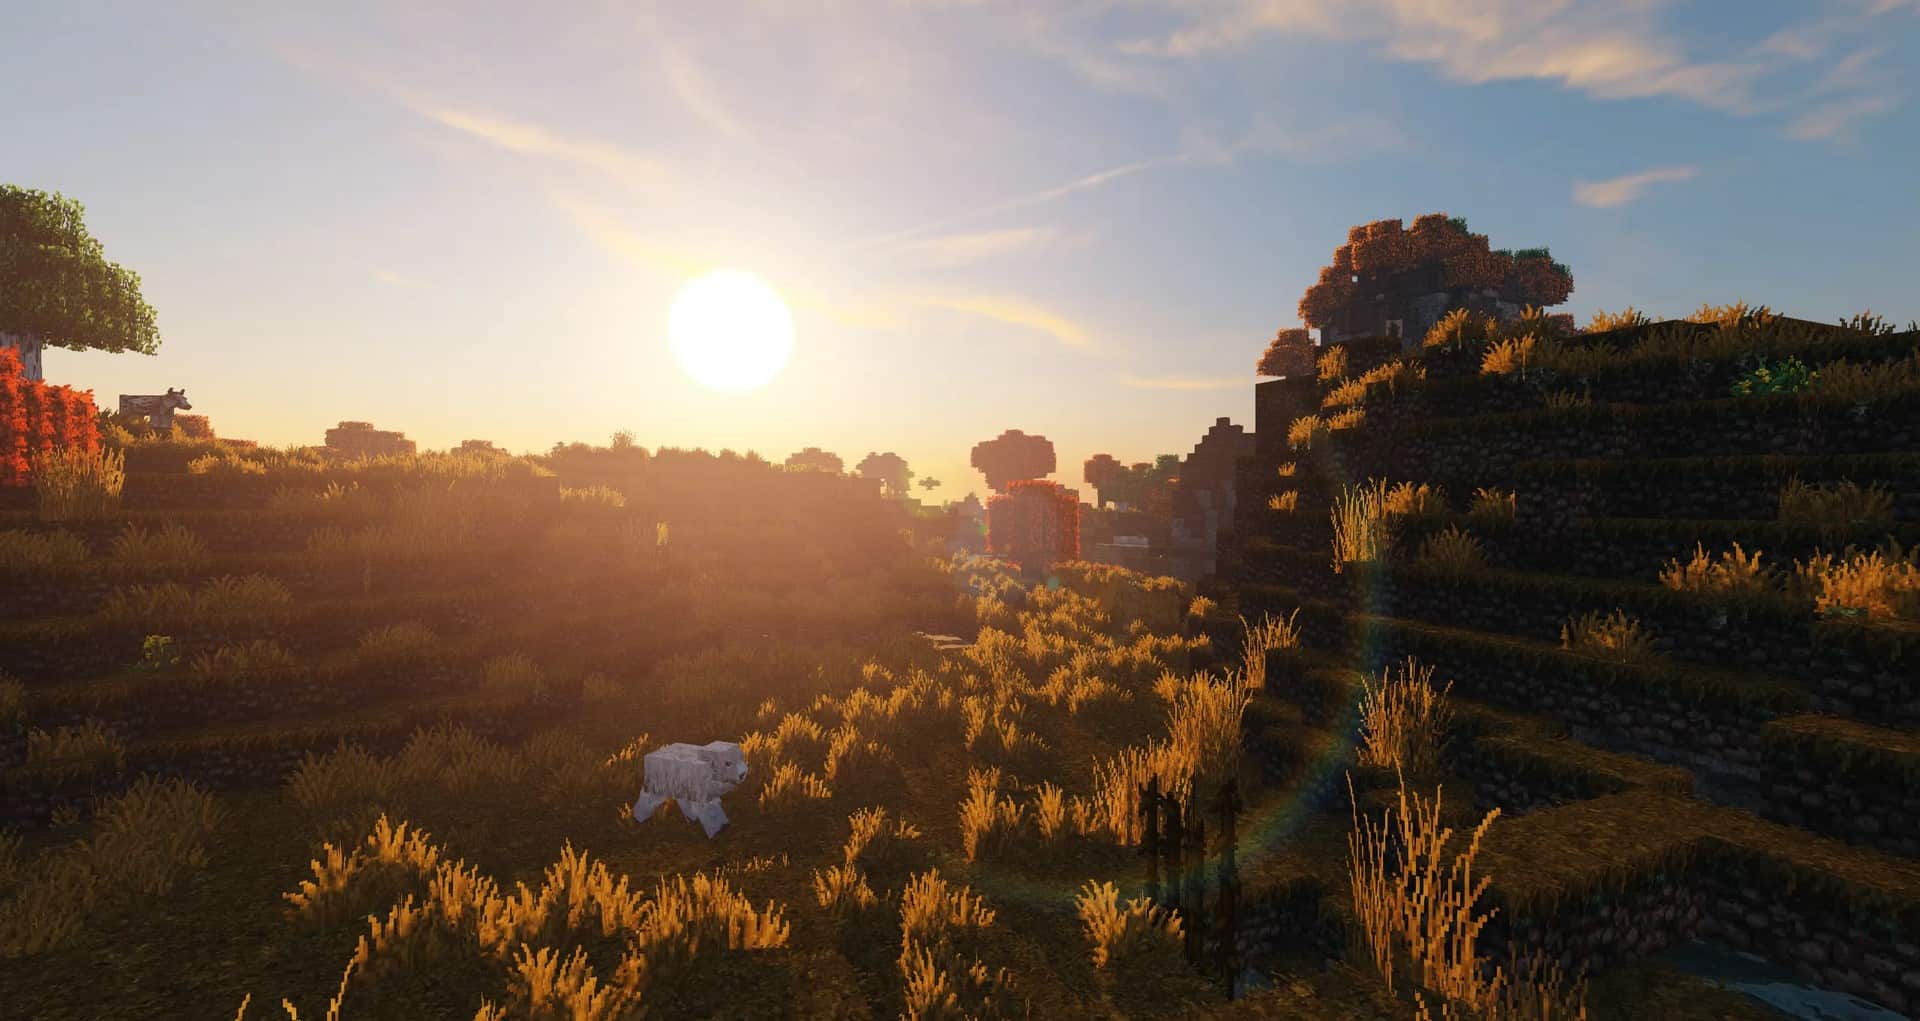
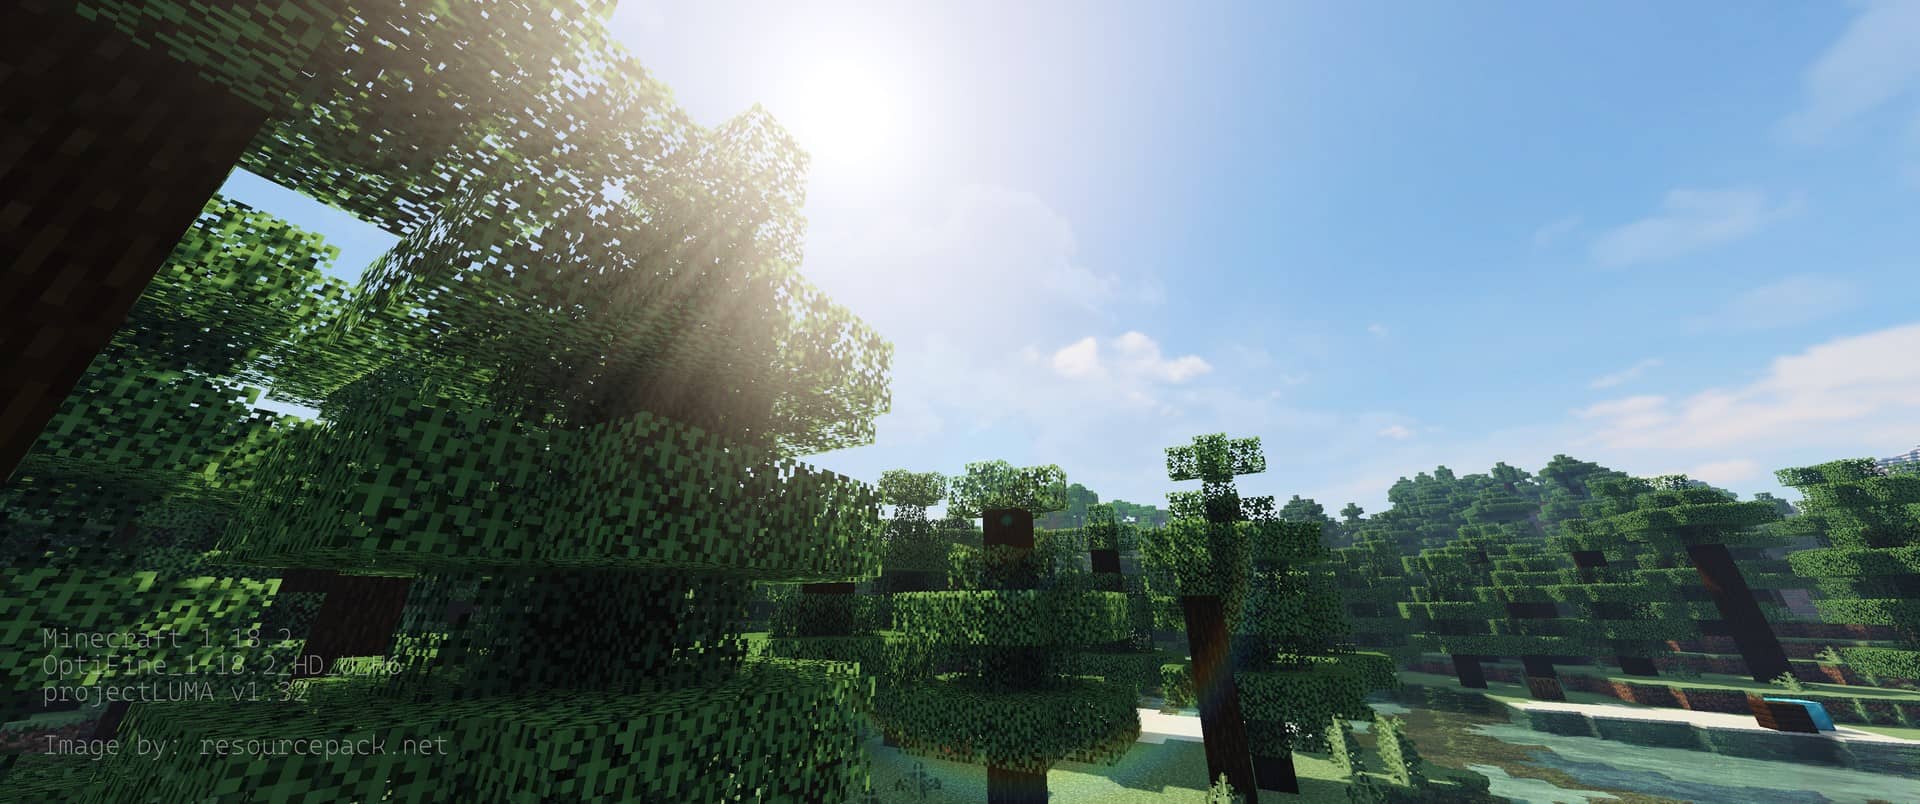
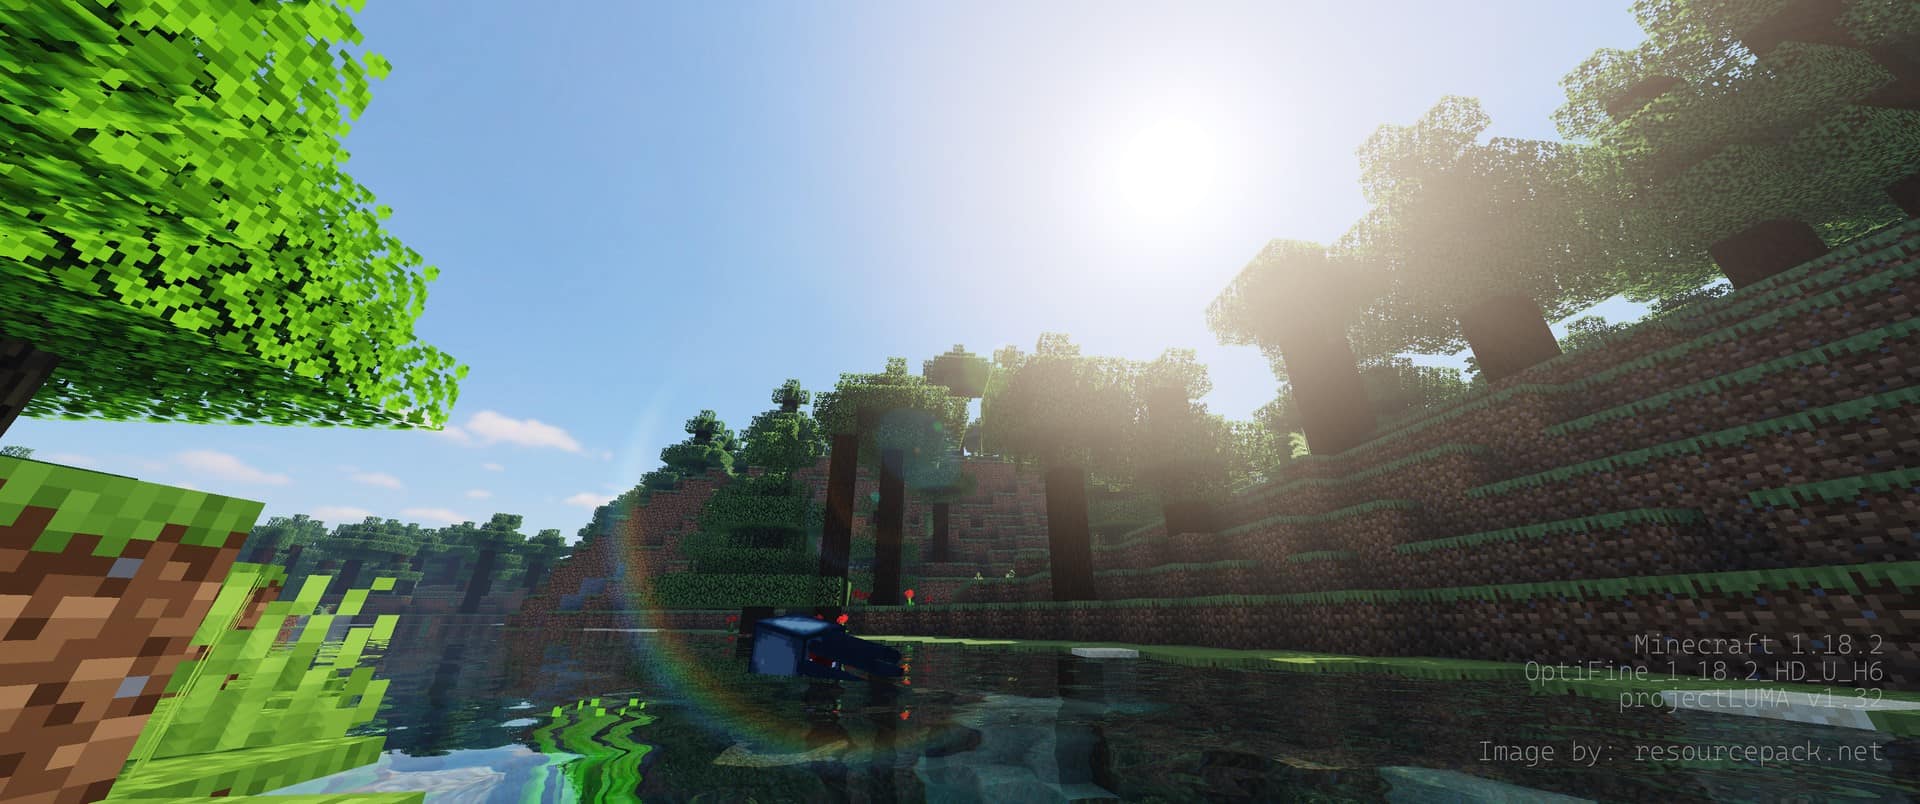
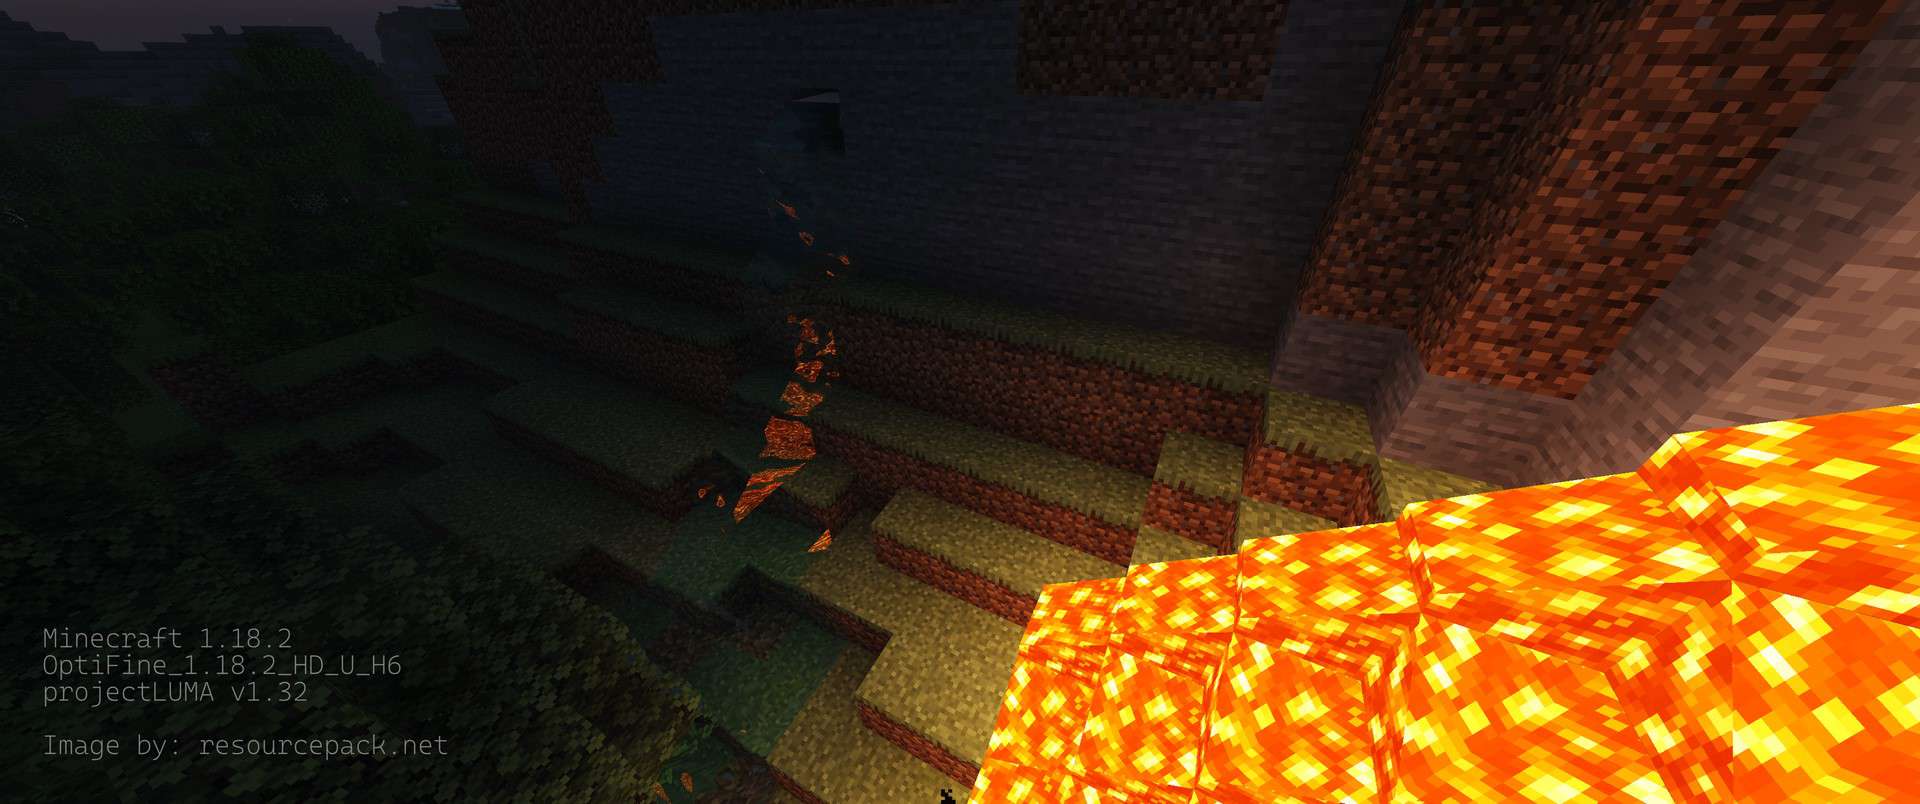
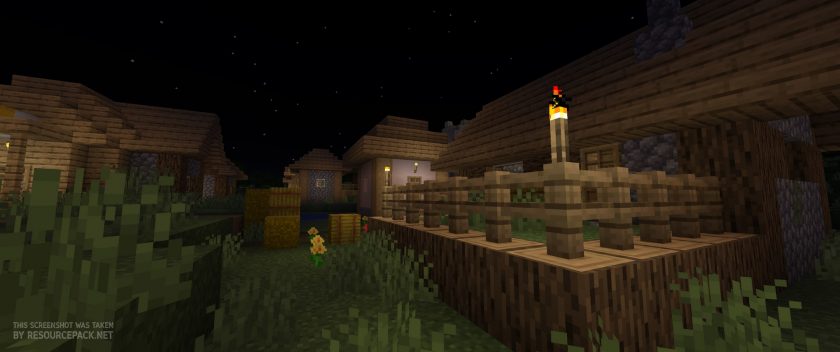
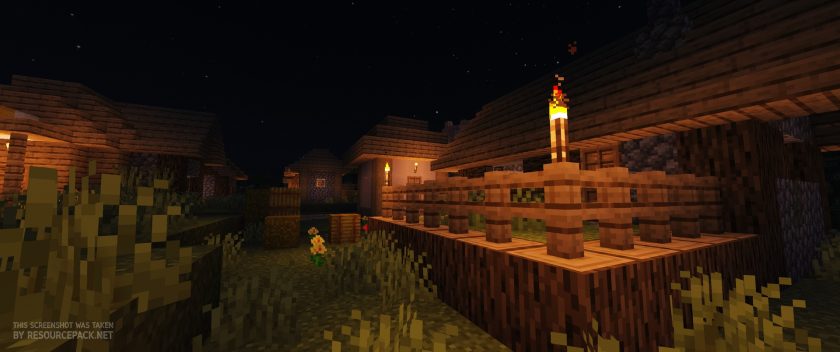
Being a spiritual successor to KUDA shader, ProjectLUMA follows a similar visual style. It introduces several improvements that considerably improve Minecraft. It works with most resource packs but even when installed on vanilla Minecraft, it makes a considerable impact. The shader pack brings several new features. They introduce new reflections which will be easy to notice when looking at the water. It also improves ambient occlusion and adds motion blur. The shader pack also alters the way water looks by adding realistic water waves. Additionally, the developers added dirty lens, auto bump, POM, and a few other features. One of the most note-worthy improvements is made to the way the sky looks in Minecraft. The Godrays feature in ProjectLUMA adds better lighting effects, light rays and changes the way the Sun looks. It also affects how shadows are projected on the ground. At the same time, the clouds look photorealistic. These improvements can also be observed during the nighttime. All the improvements and features present in the ProjectLUMA shaders also affect the textures in the game. Even when using it with an x16 or x32 resource pack, ProjectLUMA makes textures look cleaner. Details are easier to observe and colors are brighter. The ProjectLUMA shader pack needs to be installed with a tool such as OptiFine. Because it alters the sky and water, it needs access to the special features that this tool offer. Because ProjectLUMA adds many new features and effects to Minecraft, it may negatively impact your framerate. Sadly, there is no possibility to turn on or off certain features. For optimal performance, the shader pack is recommended to be installed with resource packs that use texture resolutions no higher than x64.
projectLUMA should be compatible with all of these Minecraft versions: 26.2 - 26.1.2 - 26.1.1 - 26.1 - 1.21.11 - 1.21.10 - 1.21.9 - 1.21.8 - 1.21.7 - 1.21.6 - 1.21.5 - 1.21.4 - 1.21.3 - 1.21.2 - 1.21.1 - 1.21 - 1.20.6 - 1.20.5 - 1.20.4 - 1.20.3 - 1.20.2 - 1.20.1 - 1.20 - 1.19.4 - 1.19.3 - 1.19.2 - 1.19.1 - 1.19 - 1.18.2 - 1.18.1 - 1.18 - 1.17.1 - 1.17 - 1.16.5 - 1.16.4 - 1.16.3 - 1.16.2 - 1.16.1 - 1.16 - 1.15.2 - 1.15.1 - 1.15 - 1.14.4 - 1.14.3 - 1.14.2 - 1.14
projectLUMA — Screenshots
How to install projectLUMA Shaders:
- Download and install Minecraft.
- Open Minecraft launcher and setup your game profile for the Minecraft version you want to run. – in the launcher on the top menu, select the “Installations” tab, click “New installation”, under the “Version” dropdown, select your preferred Minecraft version and click “Create”.
- Download and install Optifine or Iris. – we recommend Iris, it’s a bit more optimized;
- Open Minecraft launcher and select the newly created Optifine or Iris profile. – if in step 3 you chose to install optifine it will have an optifine profile, if iris it will have an iris profile;
- Download the projectLUMA shader pack from the download section below.
- Launch Minecraft.
- For Optifine: Go to
Options > Video Settings > Shadersand click “Shaders Folder” to open shaderpacks folder.
For Iris: Go toOptions > Video Settings > Shader packsand click “Open Shader Pack Folder” to open shaderpacks folder. - Put the projectLUMA shader pack (.zip file) downloaded in step 5 into the .minecraft\shaderpacks folder you opened in step 7.
- In the game, select projectLUMA Shaders from the list and click “Done”.
Features:
- Photorealistic skyboxes
- Godrays
- Reflections
- PBR Support
- Ambient Occlusion
- Native Motionblur
- Realistic water waves
- Dirty Lens
- Auto Bump
- POM
projectLUMA - Comparison Slider #1
Move slider back and forth to see vanilla Minecraft on the left and the beautiful shaders on the right. Use the buttons below to see how the pack looks in different situations.
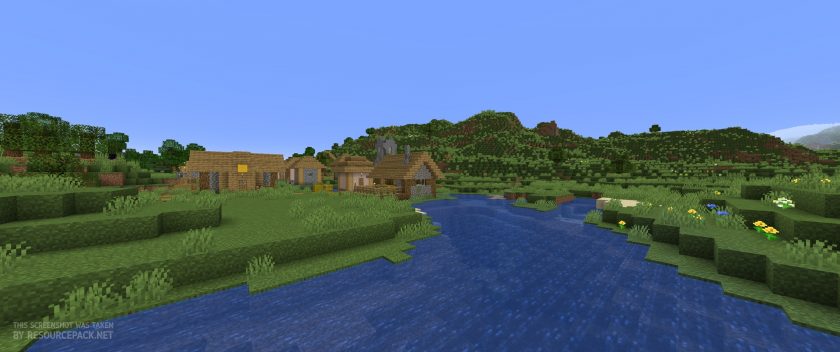 Vanilla
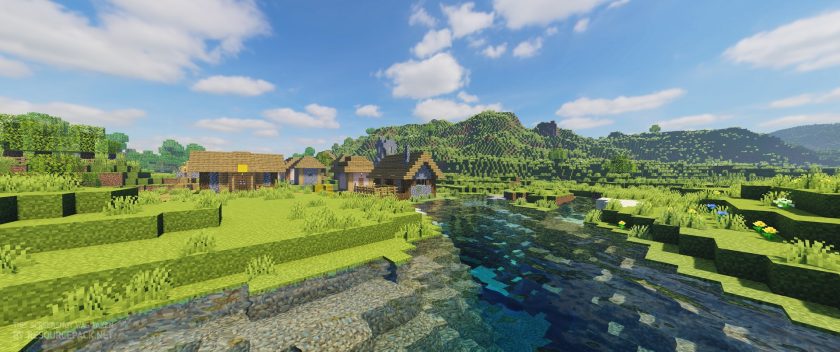 projectLUMA
projectLUMA Shader Pack Download
- We do not modify or edit any resource packs. All resource packs, shaders and tools found on this website are linked directly to official sources rather than hosted on our own servers. We provide only the official download links from the original creators to ensure that your files are safe and secure.
- These official links are updated manually and may occasionally stop working when a new version is released. We work hard to keep everything current so that you have a smooth experience. Please let us know in the comments if you find a link that no longer works.
- Minecraft is a trademark of Mojang Studios and has no official connection to this website. Our goal is simply to share the best creations from the community with other players.
- Please consider leaving a comment or voting for your favorite packs. This feedback helps authors improve their projects over time. You can also support the creators directly by visiting the official links located below the download section.
Java Edition:
[26.2.x – 1.14.x] Download projectLUMA Shaders
Curseforge: download starts automatically after a few seconds;
Mediafire: click the big blue button with the text "DOWNLOAD";
Google Drive: in the top right corner you will see a small download icon (down arrow), click it and the download should start;

551 votes
Look.. 551 users have already liked this shader pack. Give a diamond if you like it too!


Adam
Guys is this normal with this shader when i activate it there like some with ligne appears when i move?
nikola
hello how to install this shader
Admin
We have installation instructions on this page. Quite detailed, so be sure to read carefully, step by step, if you have never installed shaders before))
Martin
i cannot download it it says cannot copy or something is there help with that?
Admin
Make sure you finish downloading first. It must be a .zip archive file format. Don’t unpack it, just move it directly to your shaderpack folder.
Someone
how do you move it to your shaderpack folder?
Admin
It’s explained in the “how to install” instructions on this page. If you have never installed a shader pack, it’s probably worth a read. Since the steps are generally the same for all shader packs, it is just a one time read.
HolierEel790853
The way you want your mom said that they are all the time you need to get the best👍💯 for you to join me
Jake
Is there a way to make it so that the torch light when in hand is smooth? When I move with a torch the light just jumps around instead of smoothly following me.
Suryaveer
Go to video settings then set lightning to fancy
samiul
nice dear